Tips for saving and storing your garden seeds
By Connie Mehmel
WSU Chelan/Douglas County Master Gardener

Now that autumn is here, most gardeners are starting to put their gardens to bed. This is also a time to save the seeds from your best flowers, fruits and vegetables. With a little attention to handling and storage, seeds from open pollinated (heirloom) plants can repay your efforts with a satisfying harvest next year.
Unless you are a gambler, avoid saving seeds from hybrids. Hybrid seeds are produced by controlled cross pollination of two different varieties and are usually listed as “F1” in seed catalogs. Seeds collected from hybrids will produce plants that are not like the parent. You may end up with a keeper, but you never know.
Self-pollinating species give the most predictable results. These plants have flowers with both male and female parts. Pollination takes place within the flower itself, without depending on insects or wind. This ensures that the seed will produce plants that are true to type. You can also save seeds from plants that are pollinated by insects or wind, but they need to be isolated from others of the same species to breed true. Some common garden vegetables are both self-pollinated and insect-pollinated. Peppers are one example. If you grow both sweet and spicy peppers next to each other, you may get unexpected results if you save the seeds.
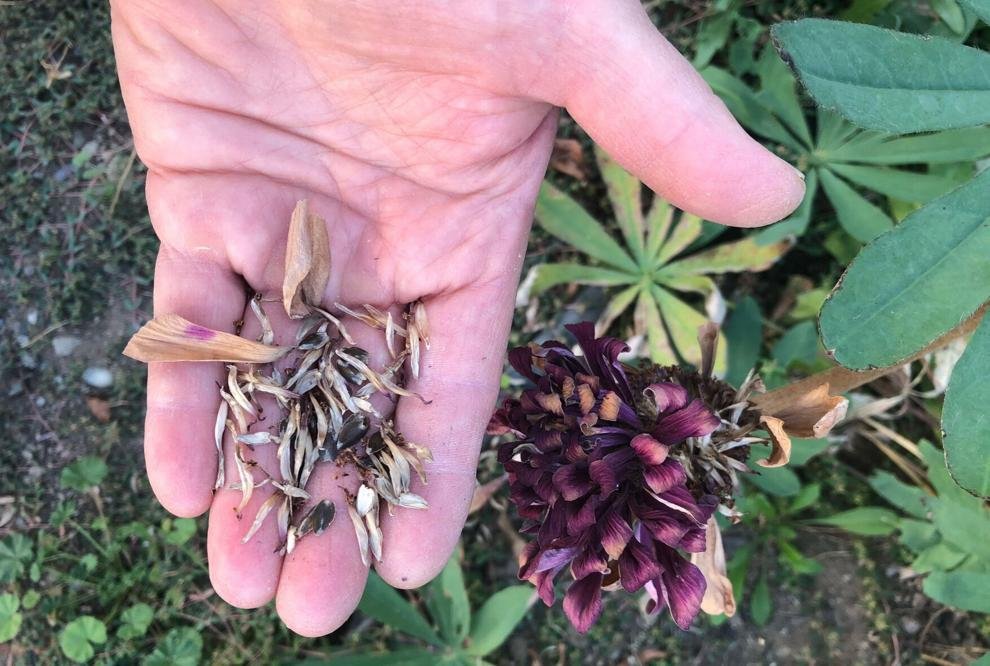
Fruits or flowers must be fully ripe or even overripe before removing the seeds and cleaning them. Seeds that are embedded in damp flesh, such as in tomatoes or melons, need to be removed, washed and dried.
Some seeds (tomato is one example) need to be fermented to remove the gel around them and kill disease organisms. This is a fairly simple process that is described in Suzanne Ashworth’s excellent book, “Seed to Seed.” It’s recommended reading for any serious gardener.
Dry seeds thoroughly before storage or they can get moldy. Lay them out on a screen or a paper plate and turn them over every day. Do this in a warm, dry place out of direct sun. The process will take a week or two. You want final moisture to be about 7%, but that is hard to measure. Try the bend test — use a couple of tweezers and put bending pressure on the seed. If it breaks, it’s dry enough. If it bends, give it another day or two to dry.
Seeds harvested from pods or husks and most flower seeds are harvested when dry. The pods or husks should dry on the vine. Flower seeds are harvested when the flower dries but before the seeds are scattered.
Once your seeds are dry, put them in a small envelope. You can buy special seed envelopes or use the envelopes from your junk mail. Be sure to label them clearly with variety and date. Store your saved seeds in an airtight container (a mason jar works well) and keep them cool, dry and dark until planting time. Save the desiccant packets you have probably received in vitamins, food products or shoes and put them in your seed container to be sure no moisture builds up.
Evaluate good storage conditions using the 100 rule: if the temperature in degrees Fahrenheit plus the humidity in percent equals less than 100, you have good storage conditions for your seeds. For example, my storage space is kept at 50 degrees F and 30 percent humidity, totaling 80.
As a seed saver, you become part of an ancient tradition. Enjoy the adventure of saving seeds.